3D Art
Naturalistic, Clay Bust Project
"Choose only one master: Nature." - Rembrandt
"It's on the strength of observation and reflection that one finds a way. So we must dig and delve unceasingly." - Claude Monet
"Inspiration is for amateurs; the rest of us just show up and get to work." - Chuck Close
Theory
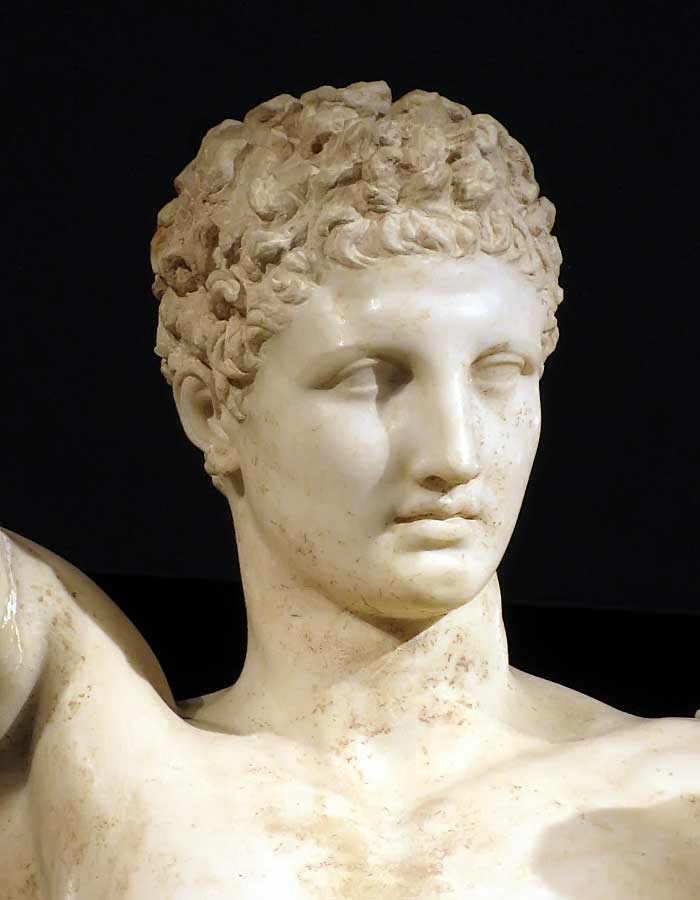
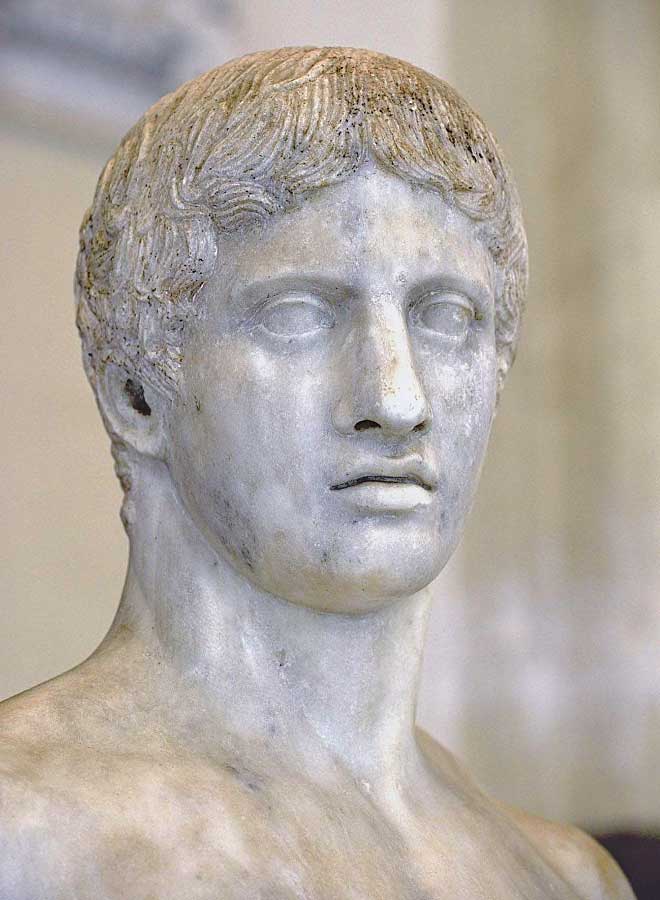
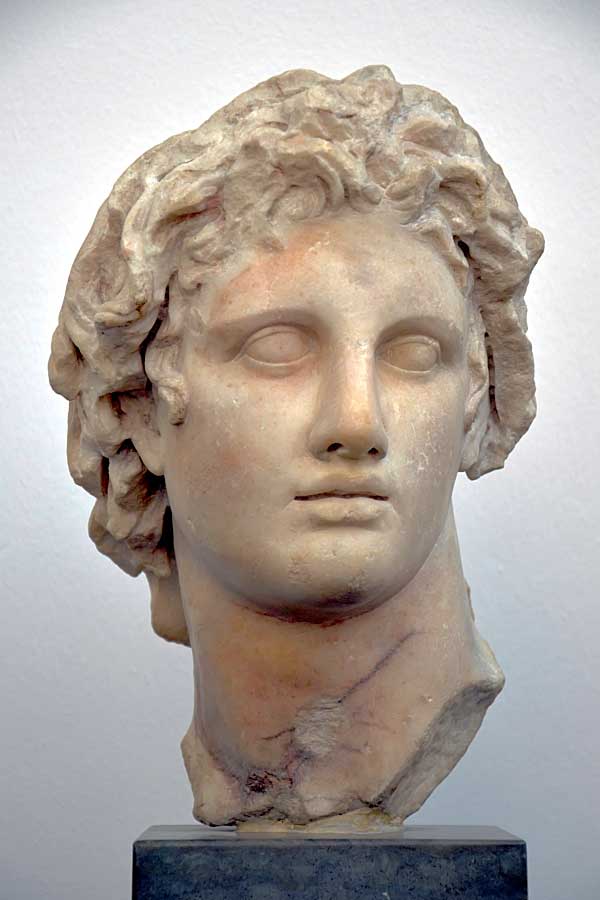
Pythagoras, Da Vinci, Galileo and Goethe are but a few of the many brilliant thinkers in human history who believed that careful observation is vitally important when trying to understand the world around us. In ancient Greece, sculptors like Polykleitos, Praxiteles and Lysippos metaphorically transformed stone into flesh by carefully observing the human form while they carved figures from blocks of marble. There is much to admire about the accomplishments of these sculptors, who've inspired countless others, down through the centuries: artists such as Michelangelo and Donatelo, perhaps two of the most recognized sculptors of the Italian Renaissance.
Our task (with the Clay Bust project) will be MUCH easier than that of the ancient masters (remember, they didn't even have power tools back then!). Our choice of material and process are the crucial elements here: we'll be using clay in an additive process instead of using stone in a reductive process.
Project Description
OBJECTIVE: Use careful observation, with ball-clay in an additive process, to create a naturalistic bust of yourself or a classmate.
MATERIALS: A 20 kg box of Plainsman Clay. The Art Department carries only Buffstone, which is relatively good clay, with medium plasticity, suitable for bisquing but not high firing. Better quality clays (finer particle size, more plasticity, capable of being high-fired with commercial gazes) are available in Calgary through Ceramics Canada.
You will also need a set of clay-working tools (available in the Bookstore), a small plastic pail and rags.
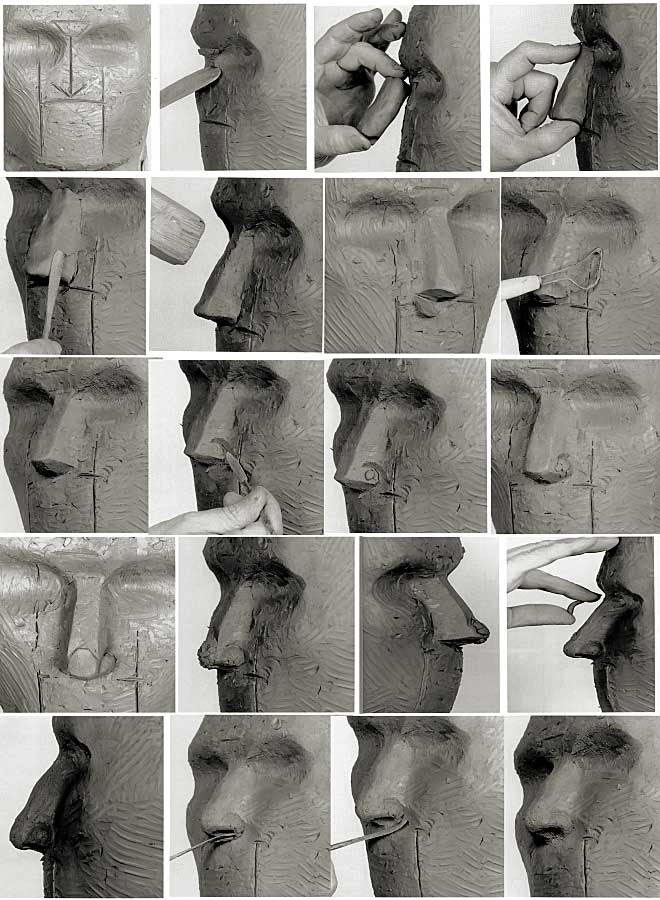
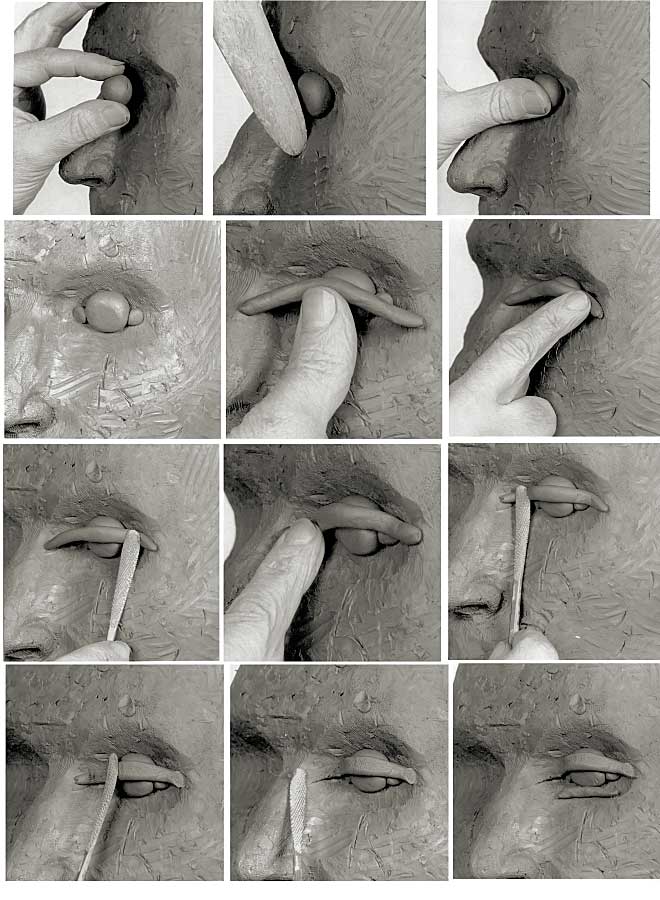
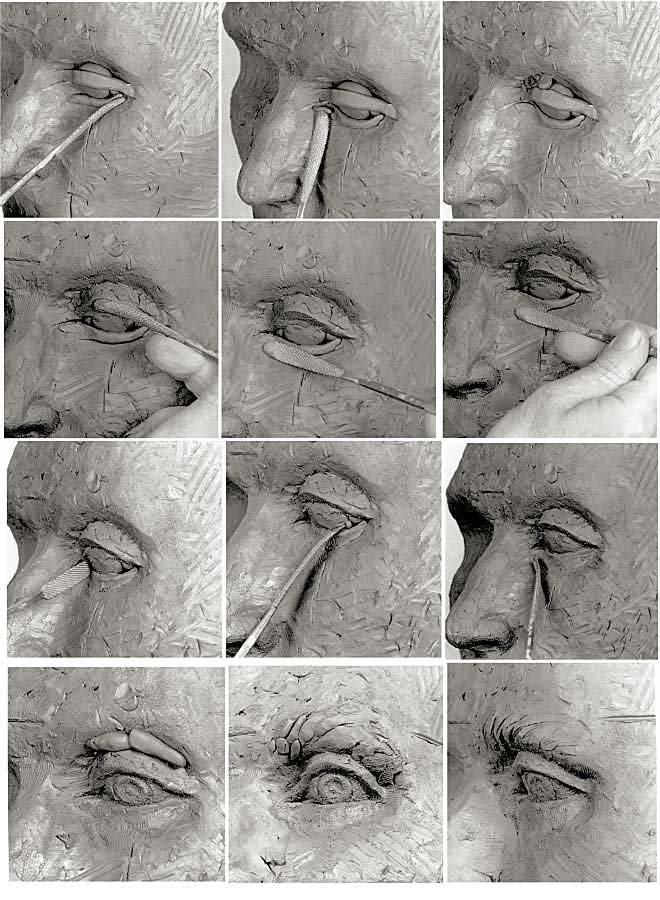
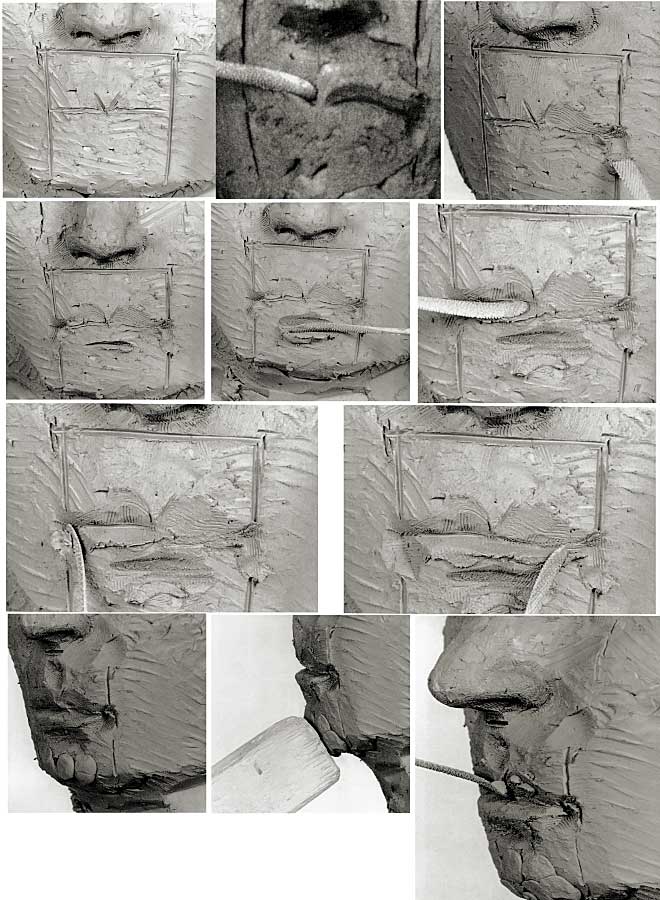
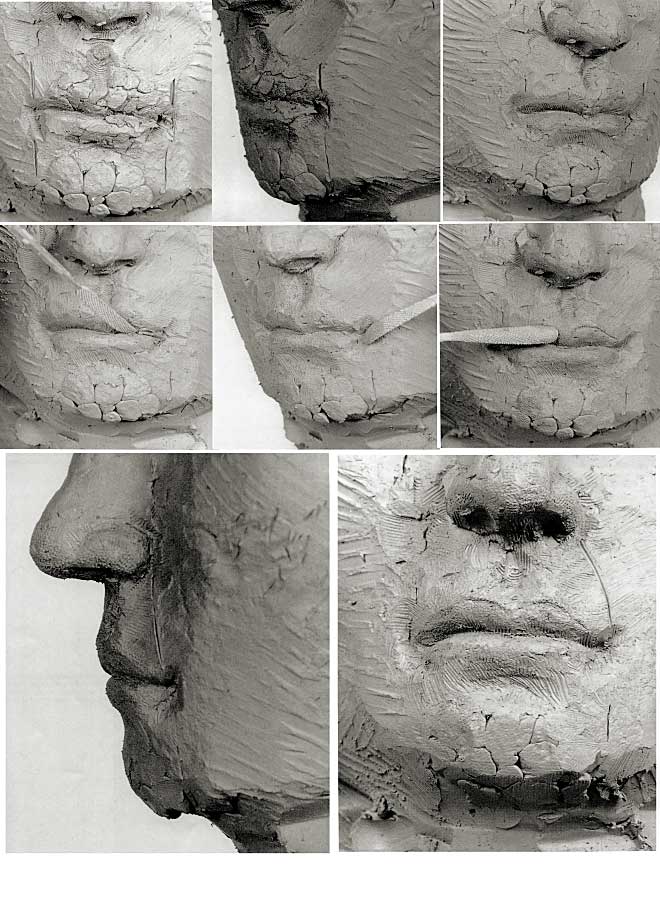
PROCEDURE: I will demonstrate the entire process of making a clay bust: making a supporting structure (armature); wedging the clay; rough-forming the shoulders, neck and head; roughing-in the features; modelling the different parts of the face and head; hollowing and drying the bust; bisquing; and finally, finishing the bust.
We will work as a group to model each feature in turn but, before we begin, please click the first image (below) of the Step-by-Step Tutorial and study the next six pages of images to familiarize you with the process.
AESTHETIC: Your bust should exhibit a keen sense of naturalism, with carefully-rendered features - eyes, nose, mouth, ears, hair - that have a convincing resemblance to yourself or your model. Your finished work must also exhibit a comprehensive understanding of the Compositional Principles of Scale and Proportion.
TECHNICAL: Your bust should be hollowed out, leaving a wall with a uniform thickness of between 3/8 and 1/2 inch. It should also be dry and stable (without cracks, fractures or broken pieces).
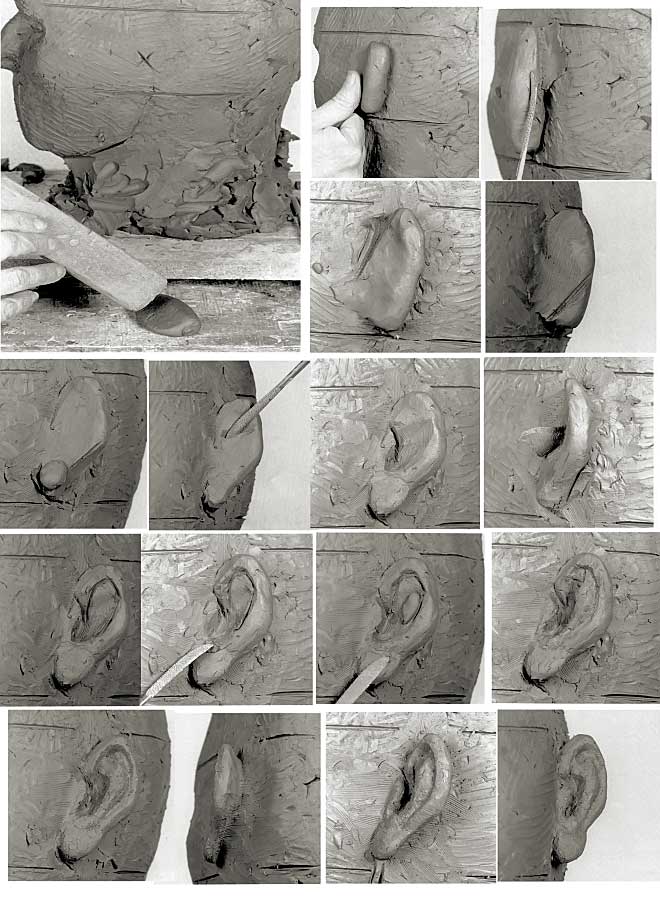
Step-by-Step Bust-Modelling Tutorial Images

Low-Relief Portrait-Modeling Tutorial Videos
EYE
EAR
HAIR
Examples of Student Work
.jpg)
.jpg)
.jpg)
.jpg)
.jpg)
.jpg)
.jpg)
.jpg)
.jpg)
.jpg)
.jpg)
.jpg)
.jpg)
.jpg)
.jpg)
.jpg)
.jpg)
.jpg)
.jpg)
.jpg)
.jpg)
.jpg)
.jpg)
.jpg)
.jpg)
.jpg)
.jpg)
.jpg)
.jpg)
.jpg)
.jpg)
.jpg)
.jpg)
Further Research
I would recommend these videos:
- How to sculpt a man’s head? Alexander Cherkov demonstrates male head sculpture of clay
- How to Sculpt a Portrait in Clay
- Live demo - male head sculpt Mark Newman – portrait sculpture
- Sculpting a head in clay part 1 FULL VIDEO
- The Case for Realism (Art Assignment, Season 4 Episode 21 | 11m 13s)
- Tip Toland Workshop -- Sculpting a Clay Head - Free Tutorial