3D Art
Paper Form Project
"There are three responses to a piece of design: yes, no and wow." - Milton Glaser
"Practice what you know, and it will help to make clear what now you do not know." - Rembrandt
Theory
3D-Art Fundamentals will introduce you to the theory, history and practice of making art in three dimensions. Our definition of 3D art encompasses a VAST territory of related practices, beginning with object-making (Kiki Smith) and proceeding from there through the interrogation of space (Robert Morris), place (Kara Walker), process (Anish Kapoor), action (Jennifer Allora & Guillermo Calzadilla) and phenomena (Nancy Holt).
It continues by means of hybrid forms that fuse sculpture with sound, music, video, drawing, painting, dance, architecture, and the list goes on. Given the enormous breadth and variety of sculptural forms in front of us, a good place to start a course about the fundamentals of 3D art is by asking, "How is a 3D composition different than a 2D composition?" To answer this question, we first need to examine how the Principles of Composition might be applied to volumes within a spatial dimension (as opposed to shapes on a surface). This is where the Paper Form Project takes us.

Project Description
OBJECTIVE: Use paper and Bristol Board (that's achromatic and middle-grey in value) to create at least four high-relief paper constructions (three small studies and one large work). Your Paper Form Sculpture must demonstrate (in three dimensions) the compositional principles of emphasis, variety, movement, balance, unity, rhythm, proportion and scale.
This project can be referred to as a "high-relief" work. The difference between low-relief and high-relief is the extent to which they occupy 3D space: low-relief compositions are mostly visible from only the front, whereas high-relief compositions have parts that are nearly freestanding (i.e., where you can almost see behind some areas of the work by viewing it from the side).
MATERIALS: You will need about a dozen sheets of heavy bond-paper (I will supply this), two full-sheets of Bristol Board (one for the support and another to cut up), white glue, scissors, an Exacto knife and masking tape. A hot glue gun is optional, but if you have one, use it because it'll greatly enhance how fast you can create your studies and finished piece.
PROCEDURE: Begin making your studies with the bond paper. You don't need a preliminary design; more important is how you handle your materials and how well you understand the design principles that we've been discussing in class (review it here: Principles of Composition).
Start by cutting the bond paper lengthwise into strips of various widths from about 1/4" to 2". Cut and fold a variety of other forms too: pyramids, cubes, spheres, cones and cylinders. Some of the shapes can be organic, some of the shapes can be geometric, but all must be NON-OBJECTIVE (follow this link to learn about the differences between abstraction and non-objective art).
When you have a sufficient number of pieces, lay them on your support and experiment with different configurations by moving parts around. When you produce something that you like, glue it to the support. The easiest way to attach a strip of paper is to glue down one end and hold it in place for a few seconds (maybe add a bit of masking tape if it wants to come un-stuck), then twist or bend the loose end and glue it down in a different spot.
Continue to add strips of paper and your other forms until your composition seems aesthetically satisfying, but be sure that you don't attach any shapes so that they're completely flat against the surface; your forms must always move away from the surface of your support and into the space above it so that the work is clearly three-dimensional.
As you work, you must continually examine your composition from every angle: above, below, each side and directly in front. If it looks terrible from one angle, you'll need to modify your design. Imagine that you're an architect and that you're designing a structure (or a set of structures) in which people will live, work or play.
Pretend that your finished work will become the maquette that you'll present to a committee that has a billion dollars to spend! With that much money, the complexity of your design will not be an issue. This means that the aesthetic appeal of your design - its use of emphasis, variety, movement, balance, unity, rhythm, proportion and scale - will be a decisive factor in whether or not they hire you.
If you're a student in the architecture program, this exercise will probably seem familiar and might even resemble some of the projects assigned by your environmental-design professors. Take advantage of this overlap and apply the lessons that you've learned in those other courses; doing so should make your learning stronger in BOTH areas.

SUGGESTIONS: During this process, DO NOT try to predetermine how your design will look. Rather, allow the process of adding strips and shapes to unfold in an intuitive way, whereby each piece of paper interacts with those that have already been added; the cumulative effect of which will suggest a "direction" that you could follow toward completion of the work. You will then refine these ideas in subsequent designs; each study leading to a more fully-realized composition with better ideas that are executed with more skill and technical understanding. This is the general process that many artists follow while they work on a maquette for a project.

These preliminary studies are meant to allow you to experiment with different compositions so that you avoid the mistake of using your first idea, which is almost always the most superficial and least interesting. As you work, you will probably notice that each study suggests ideas for further exploration. You may in fact, find it necessary to make more than three studies before you exhaust your ideas. You are welcome to make as many studies as you like, but you are required to hand in only three when you submit your finished work.
Once you've made several studies, choose the one that seems most successful. You will use this study to create your finished work by using your Bristol board in the same way that you used your bond paper.
NOTE: The finished work does not have to replicate one of your studies, but it should resemble some aspect of at least one of them. You may decide to include aspects from all of your most successful studies in the finished work. Doing so will increase the variety of your composition, but be mindful of how you integrate the various aspects of your studies so that the final result remains unified.
AESTHETIC: Your finished work must exhibit a comprehensive understanding of the Compositional Principles of emphasis, variety, movement, balance, unity, rhythm, proportion and scale.
TECHNICAL: Your work must show that you've attended to the details of cutting your Bristol Board with clean, sharp edges and affixing it to the support in such a way that excess white glue appears non-existent and the surfaces are clean and free of defects.
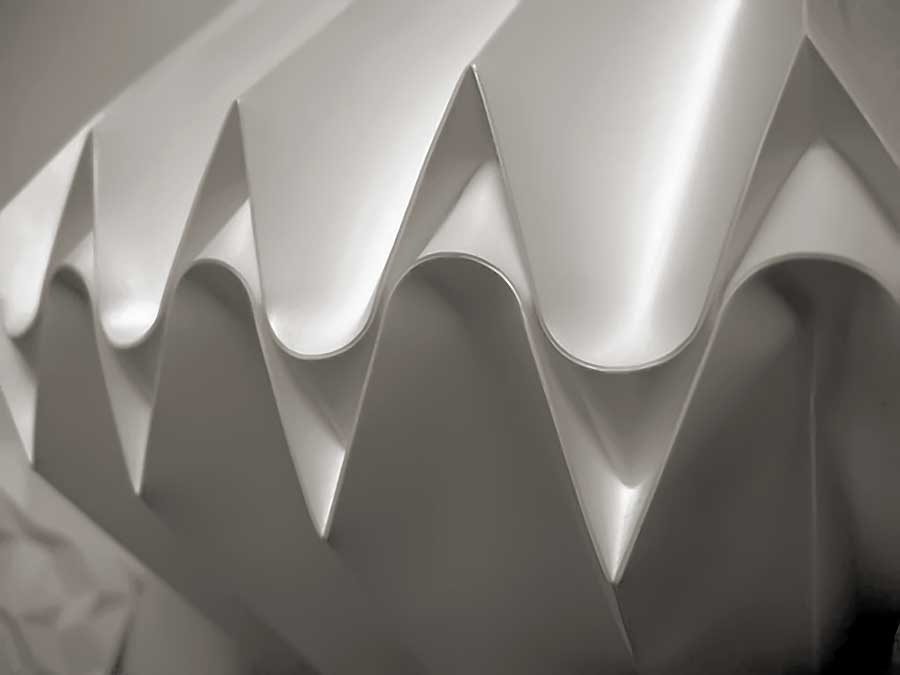
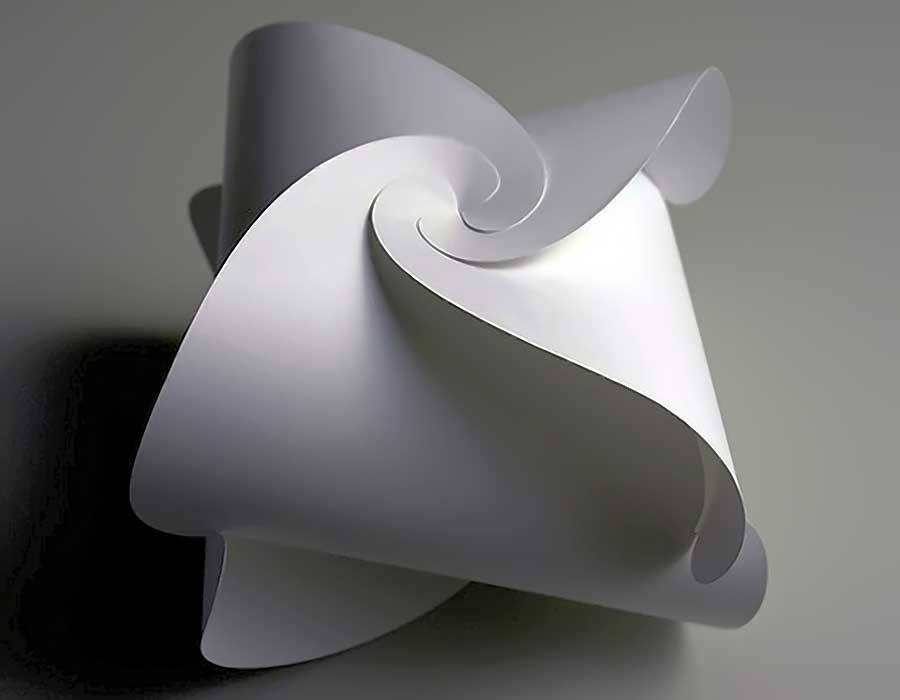
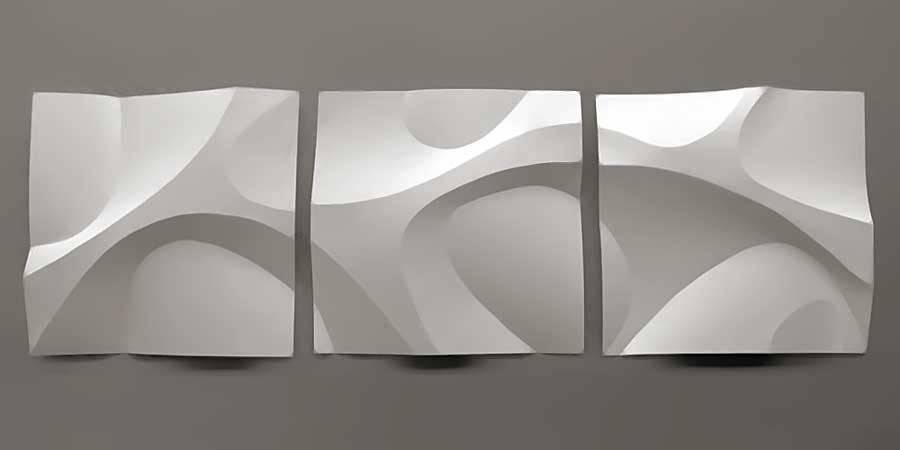
Examples of Student Work
.jpg)
.jpg)
.jpg)
.jpg)
.jpg)
.jpg)
.jpg)
.jpg)
.jpg)
.jpg)
.jpg)
.jpg)
.jpg)